How to Modify a Duda Blog Template
Welcome to part 2 of our 3-part series on the Duda blog system. Part 1 covers how to add a new blog in Duda. Part 3 will cover properly categorizing blogs in the Duda system.
Today, we cover how to modify the Duda blog template! In the content below, we’ll discuss the Duda blog layout in general, then dive into a few examples of the layout’s dynamic capabilities. Along the way, we’ll sprinkle in some tips and tricks to improve your blogs.
The Duda Blog Layout
The blog layout is a dynamic template that determines the look and feel of all of your blog posts, formatting every post in the blog system the same way.
Sections in the blog layout that are grayed out and have a “connected to data” symbol (pictured below) will change dynamically within each blog post. Dynamic sections that are typically connected to data include post image, post title, post author, post publish date, etc.
Items that are not connected to data will appear universally on every blog and cannot be changed on individual posts. These often include social media icons and related post widgets.
All sections on your blog layout can be adjusted to fit the look and feel of your website.
In the example below, we remove the background image behind the post title, post author, and post publish date and add an image to the right of the post title.
Once we finish editing this layout, every blog on our website will update to match.
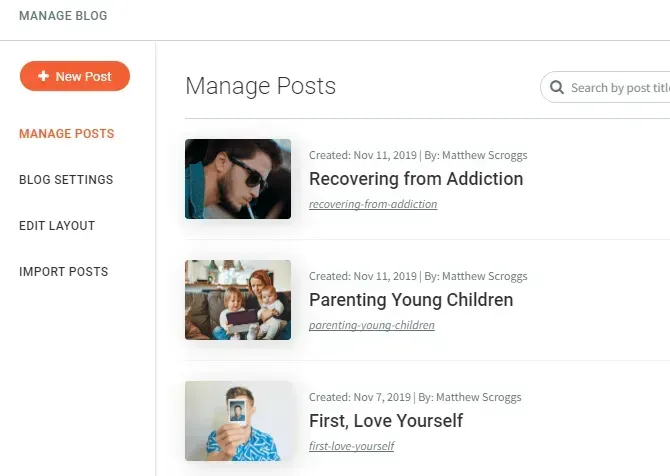
1. Within your Duda Site Editor, navigate to the “Blog” icon on the left-hand menu.
2. Select “Edit Layout.”
3. Within the layout, right click on the row containing your background image, post title, post author, and post publish date. Hover over “Add,” then select “Column.” An empty column will appear to the right of your post title, author, and publish date.
4. Navigate to the “Widgets” menu on the left-hand menu. Drag and drop an “Image” widget into your empty column. It doesn’t matter what image you select to fill this space – this widget will be dynamically connected to data, customizable per blog.
5. Drag the image column until it fits properly.
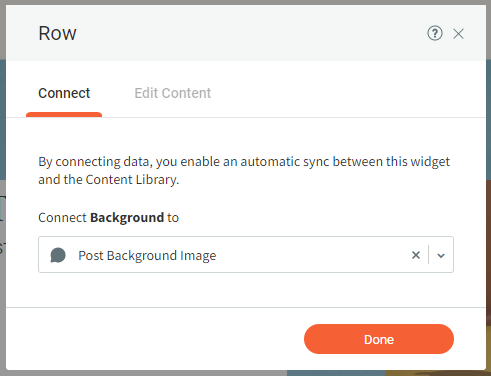
6. Right click on the row containing your background image, and select “Change Connection.” Click the “x” next to “Post Background Image” to remove the background image from data.
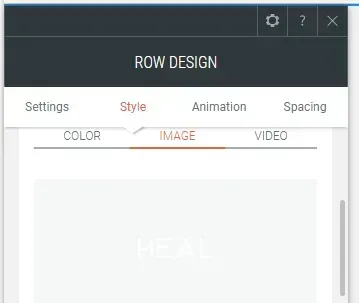
7. Next, within the same “Row Design” menu, select “Edit Design.” Under the Style column, remove the background image from the slider. A plain color or image will populate behind the post title, author, and publish date.
8. Right click on “Post Title,” select “Edit Design,” and navigate to the Text column. Click Font color, and choose a color that contrasts well with your plain background color. For example, if the background color is cream, select a dark font color. Repeat this step with your Post Author and Post Publish Date text.
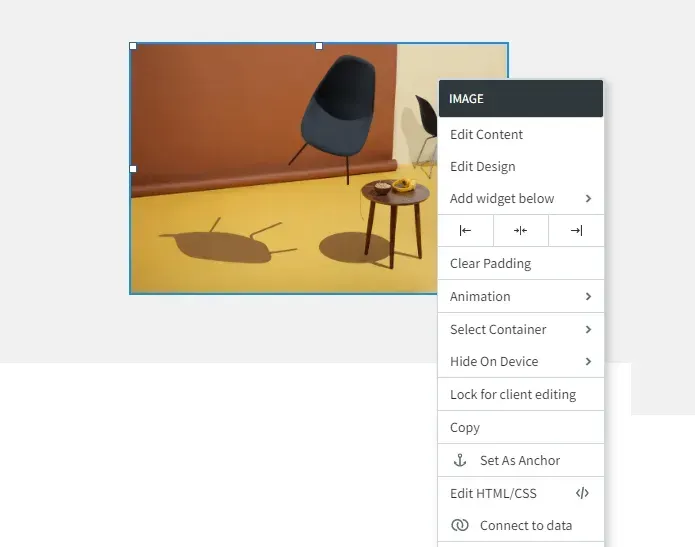
9. Next, right click on the image you recently added, and select “Connect to data.”
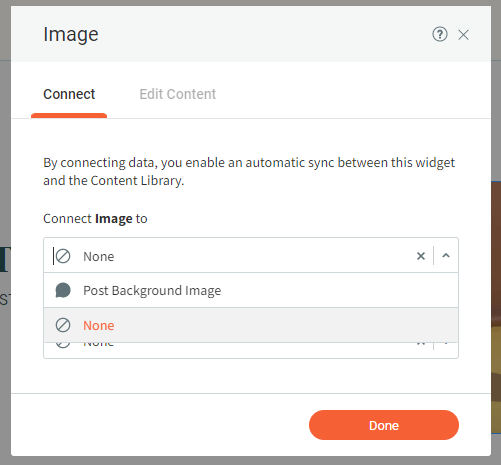
Currently, the image is not connected to any data point. Beneath “Connect Image to,” select the dropdown arrow and select “Post Background Image.”
Now, whatever image is set to Post Main Image on each individual post will automatically populate here.
In the next example, we will add categories next to our Post Subtitle and Post Text sections
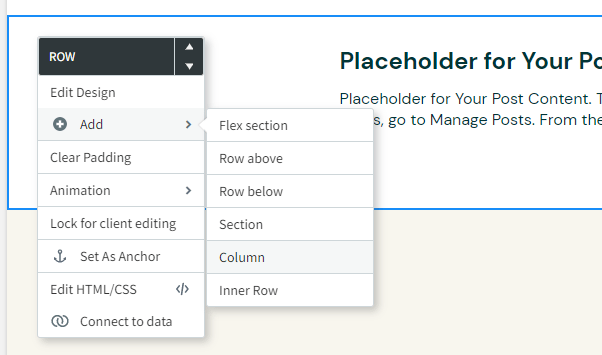
1. Right click the row containing your Post Subtitle and Post Text widgets. Hover over “Add,” and select “Column.”
2. Navigate to the “Widgets” menu on the left-hand menu.
Drag and drop a “Text” widget into your empty column.
3. Add a header titled “Categories.” We recommend using an H2.
4. Slide the Post Subtitle and Post Text widget over, so the Categories widget is smaller than the body copy of your blog.

5. To begin adding categories, right click the Categories header, and hover over “Add widget below.” Select “Text.” Repeat for as many categories as you would like. An in-depth overview of creating categories for your Duda blog will be released in part 3 of our 3-part Duda blog tutorial series. Again, this category list will be pulled into every blog on your Duda website.
When you’re satisfied with the look of your Duda blog layout, select “Done.” At any time during the process of editing your blog layout, you may also select “Preview” to see what the blog template will look like on a live blog.
Do You Want More Duda Tutorials?
Thanks for following along as we explored how to edit your Duda blog layout. In Part 3 of our series, we’ll cover categorizing and tagging your Duda blogs.
As part of our comprehensive approach to website optimization, RivalMind employs advanced SEO strategies tailored specifically for Duda, ensuring that your content not only looks impressive but also ranks prominently in search engine results, driving more organic traffic to your site.
Stay posted on our YouTube channel or on our
digital marketing blog.

Meet the Author
Harley Helmer
Lead Search Marketing Strategist
Harley Helmer is a digital marketing professional with nearly a decade of experience in the industry. Today, he's the head of search marketing strategy at RivalMind, responsible for developing and executing comprehensive SEO campaigns that improve online visibility and boost organic traffic. His pragmatic, no-nonsense approach to marketing – paired with a robust knowledge base – helps him deliver innovative solutions to technical challenges and deliver real client success.
Specialties: SEO Gold Mine, Idea Guy
Looking for more organic website traffic?
Welcome to RivalMind. Our purpose is to help your business thrive. We are a digital marketing agency that offers SEO, PPC, Web Design, Social Media and Video Solutions as tools to our clients for online business development and growth.
Contact us today to get started!
Blog Contact Form
Connect with Us:


